Wood Floor Installation: A Guide to Getting It Right
Wood floor installation needs to be done right first time, because fixing avoidable mistakes later is time-consuming, costly, and disruptive. Whether you’re laying engineered or solid wood flooring, success comes down to preparation, product knowledge and precision.
This guide gives you the practical insights and expert advice you need to install your floor beautifully, ensure lasting performance, and maintain stability over time.
Start with Careful Preparation
Many wood floor installation failures trace back to poor preparation. This stage matters just as much as the flooring you choose.
Acclimatisation
Boards must acclimatise in the installation room before fitting. This prevents unexpected movement after installation. Acclimatisation is the process of allowing your flooring to adjust to the temperature and humidity of the space where it will be laid.
Keep the Woodpecker flooring in the box, in living conditions for:
– Solid wood: 5-10 days
– Engineered wood: 3-4 days
Moisture
Moisture testing is essential. It checks the moisture levels in both your subfloor and the room’s humidity to make sure they’re suitable before installation begins.
As a guide, moisture levels should be:
| CM Reading (%) | Approx. RH (%) | Approx. WME (%) | Approx. MC (%) | Suitability for Wood Flooring |
| ≤ 0.5% CM | ≤ 75% RH | ~11–12% | ~0.3–0.5% | Acceptable – Install wood floors |
| 0.6% CM | ~80% RH | ~12.5–13% | ~0.6–0.7% | Borderline – Dry further or apply surface DPM |
| 0.7% CM | ~85% RH | ~13.5–14.5% | ~0.8–0.9% | Too wet – Not suitable without specialist prep |
| > 0.7% CM | >85% RH | >15% | >1.0% | High risk – Will cause failure without treatment |
Engineered and solid wood flooring respond to their environment and excess moisture can lead to boards expanding, warping or lifting once laid. Taking the time to check these levels is essential for a floor that stays stable and performs long-term.
Subfloor Preparation
The subfloor must be flat, clean, and dry. Even slight unevenness causes movement and squeaks over time. Don’t treat this as optional: proper acclimatisation, moisture checks and subfloor preparation are all part of the recognised standards that protect against movement, damage and failure after installation. Here is a list of the British Standards that relate to the different floor types:
| Standard | Title / Purpose | Applies To |
| BS 8201:2011 | Installation of flooring of wood and wood-based panels | Wood flooring |
| BS 8204-1:2003+A1:2009 | Screeds: cementitious and concrete bases | Wood flooring |
| BS 8204-7:2003 | Self-smoothing screeds – particularly calcium sulphate (anhydrite) | Wood flooring |
| BS 8485:2015+A1:2019 | Vapour and ground gas protection (context for DPMs) | Related to damp treatment |
If you’re still weighing up your options, our guide on Engineered vs Solid Wood Flooring offers a clear comparison to help you choose the right material for your home.
Choose the Correct Wood Floor Installation Method
There isn’t one wood floor installation method that suits every project. The right choice depends on your flooring type and the room conditions. Making the right decision here is essential for performance and longevity.
Engineered Wood Floor Installation
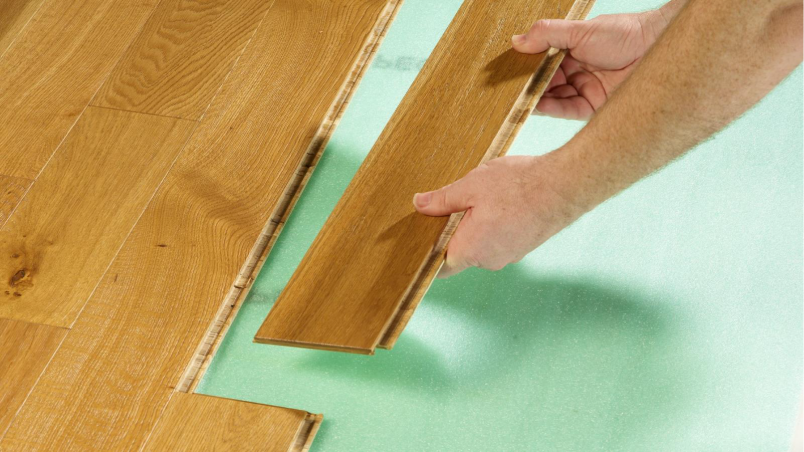
Engineered floors offer flexibility. Most tongue and groove boards can be floated, glued or nailed and boards with click-joint technology are designed specifically for floating.
Floating installation is the most straightforward method for many engineered boards. Click-fit systems lock into place without the need for glue or nails. It’s fast, clean and allows easy fitting over underlay, making it ideal for competent DIYers and installers looking for speed without compromising stability.
Glue-down installation isn’t just for herringbone or chevron patterns, it’s an option for any tongue-and-groove engineered floor. Why choose it? If you have underfloor heating, it is essential to stick your engineered tongue and groove boards down. Adhesive bonds boards directly to the subfloor, delivering improved acoustic performance, reduced movement underfoot, and a more solid feel. 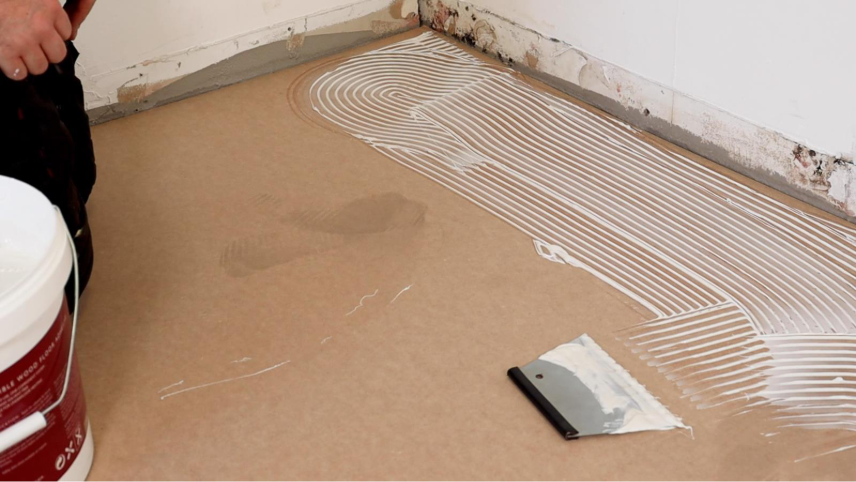
Solid Wood Floor Installation
Solid timber is more reactive to seasonal and environmental changes, so it requires a secure fixing method to manage expansion and contraction. You can nail or glue solid wood, depending on your subfloor. Both methods offer excellent long-term results when installed correctly.
Nail-down is a traditional approach, particularly on timber subfloors like battens or plywood. Where the solid wood floor has a 18mm thickness or above this can be a good option as a structural floor over joists. 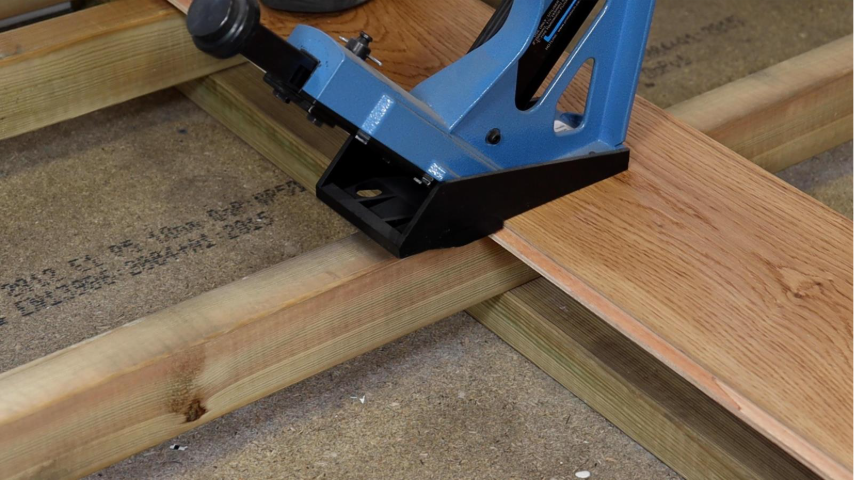
Glue-down is often used over concrete substrates or where nails aren’t practical.
Considering Patterns Like Herringbone or Chevron
Patterned designs such as herringbone often cost more to install, and for good reason. They demand careful set-out, precise cuts and expert fitting. While glue-down isn’t mandatory for all patterns, it’s commonly chosen to achieve a secure, professional finish. Budget realistically not only for materials but also for preparation, adhesive and skilled labour. For a closer look, see our guide on Herringbone Installation Costs.
Avoid the Common Pitfalls
Even the highest-quality floorboards won’t deliver a lasting result if basic installation principles are ignored. Avoid these well-known issues to protect your investment.
One critical detail that is too often overlooked is allowing for the correct expansion gap. Wood naturally expands and contracts with changes in humidity and temperature. Without enough space around the perimeter, boards will buckle, lift or develop pressure points.
Recommended expansion gaps:
- Expansion gaps for solid wood flooring measuring up to 5m in width should be 10-15mm. Thereafter an extra 2mm per metre should be added.
- For engineered wood floors, the same gap should be used for areas up to 8m in width. Thereafter, an extra 2mm per metre should be added.
| Area Type | Expansion Gap (minimum) | Notes |
| Normal residential areas (up to 8m length x 5m width) | 10–15 mm | Standard requirement for most solid and engineered floors. |
| Large areas (above 8m in any direction) | 15mm for areas up to 8m in width, thereafter 2mm per m1 | Gap must increase with size. Intermediate expansion breaks may be needed. |
| Very large or open-plan areas (e.g. over 10m x 8m) | Break up floor into zones using movement joints or T-sections | Use expansion trims at doorways or thresholds. Always follow manufacturer’s size tolerance limits. |
| Commercial environments | Minimum 15 mm, often more depending on traffic, humidity, and HVAC systems | Commercial settings have higher and more variable traffic and climate loads. Wider expansion may be necessary. |
These gaps aren’t a suggestion; they’re essential. Skip these steps and your floor is more likely to fail.
Poor subfloor preparation leads to visible problems down the line. If your subfloor is damp or uneven, it will cause movement, bounce or warping, and fixing it after installation is far more difficult.
Finally, underlay isn’t just an extra. It’s essential for floating installations. It delivers sound insulation, helps level minor imperfections, and acts as a moisture barrier. Choosing the right underlay for your floor type is a professional-standard step that shouldn’t be missed.
Don’t Forget Aftercare
Wood floor installation is the start of your floor’s life. Protecting your investment requires straightforward, consistent maintenance.
Clean with suitable products that won’t damage finishes. Avoid excessive water and mop up spills promptly. Use rugs or protective pads in high-traffic areas to prevent wear and damage.
For detailed guidance, see our post on How to Clean Wood Flooring.
Make an Informed Choice
Your flooring decision deserves proper research and planning. A quality wood floor isn’t just an aesthetic choice; it’s a long-term investment in your home’s character and value.
Choosing the right product, preparing your space carefully, selecting the correct wood floor installation method and caring for it properly ensures your floor will reward you for decades.
If you’re considering options or looking for more guidance, these resources may help you plan your project:
With proper planning, the right materials and reliable advice, you can enjoy the beauty and warmth of real wood flooring installed the right way, first time.