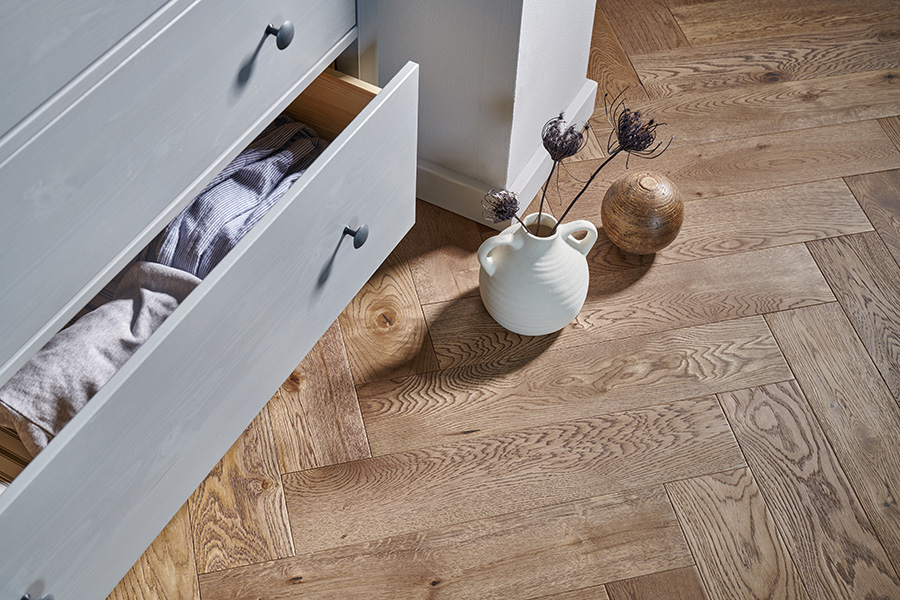
How to Lay Parquet Flooring: Tongue-and-Groove Installation

Parquet flooring has a timeless beauty and precision that instantly elevates a space. Understanding exactly how to lay parquet flooring with a tongue-and-groove system is essential for achieving a flawless result. This guide blends detailed instructions with practical advice so you can confidently lay flooring that’s both stunning and long-lasting.
Preparation: The Foundation for Success
Before you begin learning how to lay parquet flooring, ensure the environment is ready. All wet trades such as plastering and screeds must be complete, windows and doors fitted and watertight, and the building thoroughly dried. The subfloor should be clean, dry, and flat, with no more than 3mm variation over 2m, and it must be free from structural defects, infestation, and debris. Any hot pipes should be insulated to prevent localised hotspots.
Moisture levels are critical. Using a professional moisture meter, confirm that cement-based subfloors read no more than 70% RH and wooden subfloors no more than 11% WME. Read our top tips for herringbone installation for guidance on creating a level subfloor, and blending variation. Acclimatise sealed, unopened packs in the installation room for 3-4 days at 18-22°C and 40-60% RH.
Leave expansion gaps of at least 10-15mm (or 2mm per metre span) at all fixed points, including walls, pipes, and thresholds. In rooms wider than 5m, additional expansion provisions will be necessary.
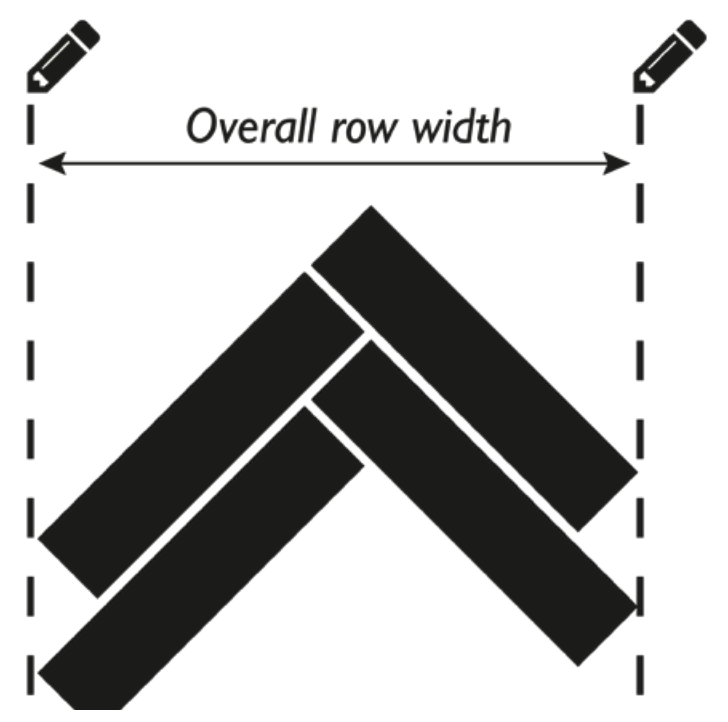
Setting Out the Pattern
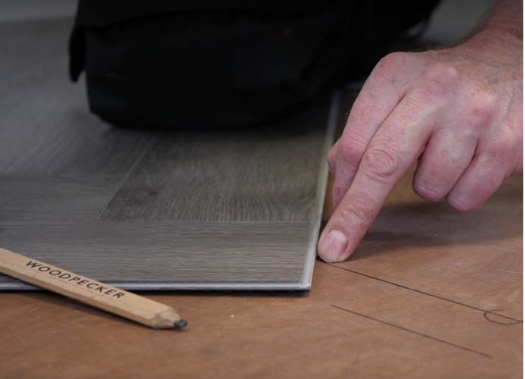
When deciding which way to lay wood flooring, think about light direction and room proportions. Establish the central V of the pattern to create your first line, ensuring perfect alignment. Then mark the other two guide lines to accommodate the first row, keeping them parallel and accurately spaced.
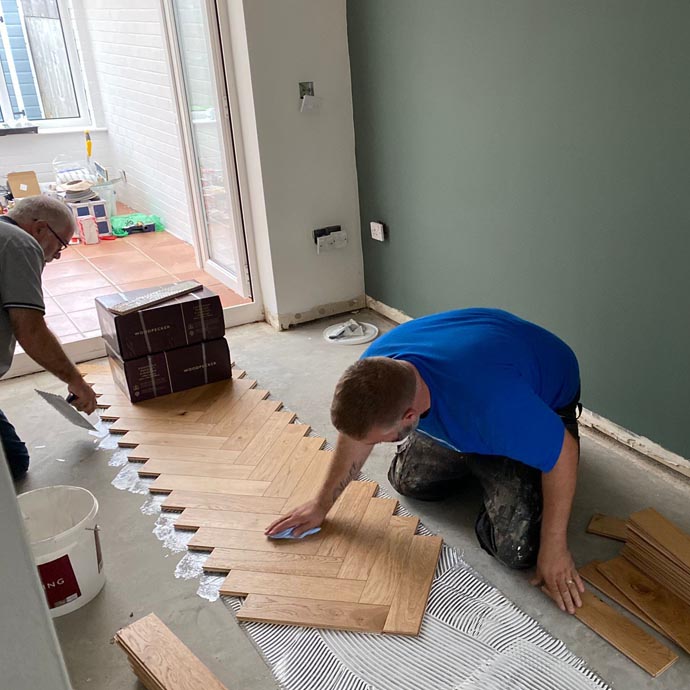
Glueing Tongue-and-Groove Parquet
Inspect every plank for damage before fitting. With your guidelines in place, apply Woodpecker MS Parquet Adhesive using a 3mm or 4.8mm notched trowel, spreading only what can be covered within 30 minutes. Position the first row between the guidelines, ensuring joints are tight. Tap or pull boards into place gently – never with a direct mallet strike. Continue installing outwards, row-by-row, checking alignment regularly. At the edges, cut boards to fit while maintaining expansion gaps. If you accidentally get adhesive on the surface, use specialist products to get glue off hardwood floors. Allow adhesive to cure for 2 hours before light traffic and 24 hours before placing furniture.
Working Around Pipes and Door Frames
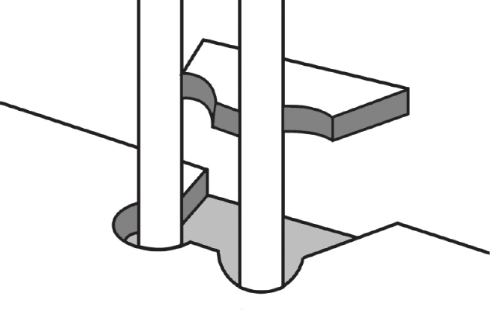
For central heating pipes, drill a hole 16mm larger than the pipe diameter, cut at a 45° angle, fit the board, and glue the offcut back in place. Finish neatly with our solid wood pipe covers. For door frames, undercut to the flooring and underlay height so boards slide underneath while keeping the expansion gap.
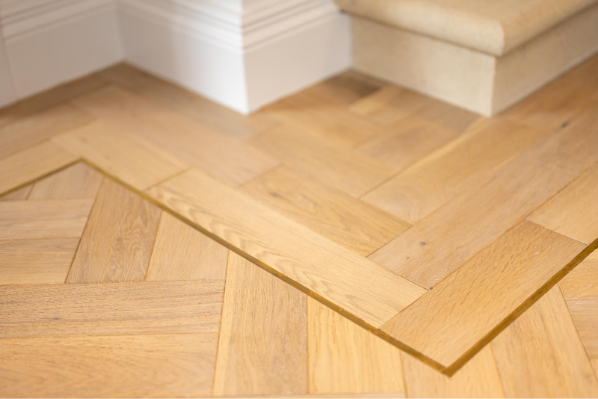
Installing Borders
For a striking finish, consider adding a border and design strips. Install the main pattern beyond the border line, cut back to a straight edge, then lay the border separately. If combining parquet with planks, our guide to combining styles offers expert tips.
Final Touches
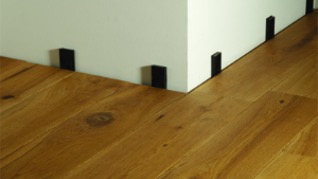
Once cured, remove spacers, fit skirting or trims (fixed to the wall, not the floor), and clean with approved products. Real wood’s warmth, authenticity, and longevity are unmatched – as explained in our engineered vs solid wood comparison and solid wood FAQs. With proper care, your parquet will develop character over time, a hallmark of quality wood floors. For cost considerations, see our herringbone installation cost guide.
By following these steps, you’ll master how to lay parquet flooring, creating a space that’s timeless, elegant, and enriched by the enduring beauty of wood. Learn more styling parquet in our timeless style guide and see it in action in our Goodrich Natural Oak case study.